VARKON - 6 min tutorial
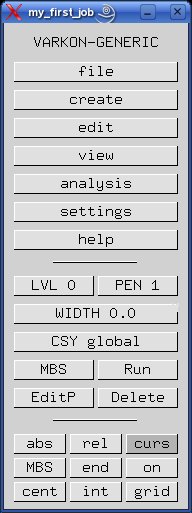
When Varkon is started, you will see two windows. One is the menu window. The upper part of the menu window is dynamic and shows the currently active menu. The rest of the menu window is static and never changes.
From the menu window, select create. A new menu will then
be presented with different things to create. Then select point
and finally select free.
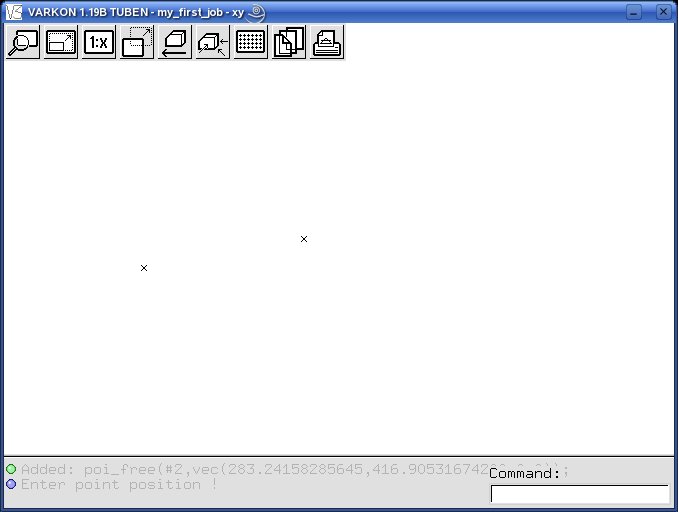
Now, move the mouse to the graphic window and create a point by pressing
the left mouse button. Move the mouse and create one more point. Finally,
with the mouse still in the graphic window, press the right mouse button.
This will end the create/point/free function and make you return to
menu mode. Your graphic window will show two points.
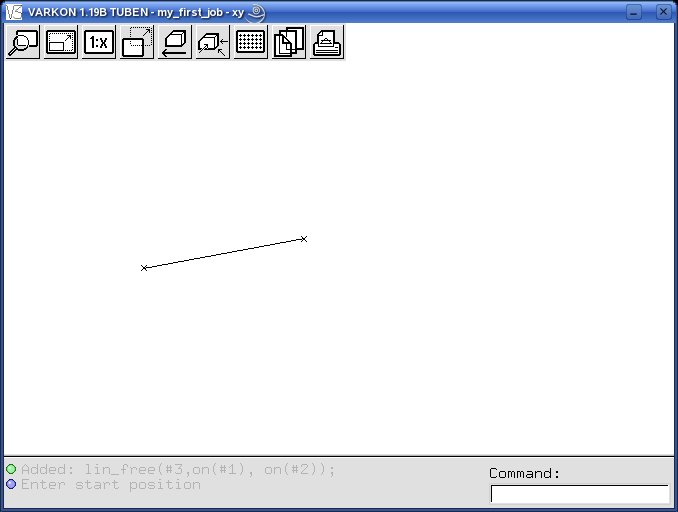
Next step is to connect the two points with a straight line. Move the
mouse back to the menu window and press the middle mouse button to return
directly to the main menu. Then select create/line/two pos.
You have now activated the function that creates lines between two positions. In
order to snap the line to the points you created, switch snap mode
by pressing the on button in the lower part of the menu window.
Now, move the mouse to the graphic window and use the left mouse button to create the line by first selecting one point and then selecting the other. Exit the line function and return to menu mode by pressing the right mouse button. This is what your model looks like right now:
You can now go to the next section, you have 3 minutes left !
Varkon 1.19D svn # 120M